About the Glue Crawler
Glue Crawler is used to get the metadata or schema of the data store it scans. Metadata here means important aspects of data such as column names and their data types and datastore here means the place from which data is obtained which can be either database or the s3 bucket. The crawler has an inbuilt classifier that identifies the data type of columns in case the data is stored in tabular formats such as a CSV file or the data in a relational database. It can identify the structure of data in JSON format, but one needs to write code to flatten it and bring it to a tabular format. The crawler after obtaining the metadata stores this data in a database. The metadata stored is referred to as AWS Glue Data Catalogue which is especially useful while performing a Glue Job which is covered in the next section.
To learn more about AWS Glue Data Catalogue you can visit https://rb.gy/n0spln .
This operation of obtaining the metadata and storing it in the AWS Glue Catalogue is called scanning of the data. It should be noted that one can run a Glue Job without running the crawler through the data store. It is only that crawling the data store makes it easy when using the graphical interface in the Glue Studio and makes it easy for the user if there are many tables stored in the data store. Also, it must be kept in mind that the crawler cannot scan through all file types. It supports only scanning through or crawling through CSV, JSON file formats. If the datastore is a relational database this should not be an issue but if your data is stored in an s3 bucket under files, then it is important to note down the file formats and look if it is supported. An extremely popular file format .xlsx (excel file type) is not supported by the crawler or the Glue Studio and therefore you must convert these file types to a format such as CSV so that you can run Glue Job on them. Also, one need not run the crawler every time if they are certain that columns and datatypes have not changed from the last crawler run. Unnecessary running of crawlers can increase your expenses so use them judiciously. You will need to run the crawler multiple times only when the names of the columns are changing or new tables or schemas or files is being added with different column names to the datastore.
An example of using the crawler
I have experience using AWS Glue in one of my projects in my organization. I know the problems one faces while using it. I wanted to help those who want to know how to make use of AWS glue for the ETL (Extract Transfer Load) process. The blog describes all AWS glue functionalities such as crawlers, glue jobs, connections, etc. It covers which policies to be attached to the IAM roles of diverse types of jobs. It also covers aspects related to cost-saving while using it.
This example is borrowed from the used case in my organization. I have used a Kaggle dataset to perform the crawl operation for exemplifying purposes.
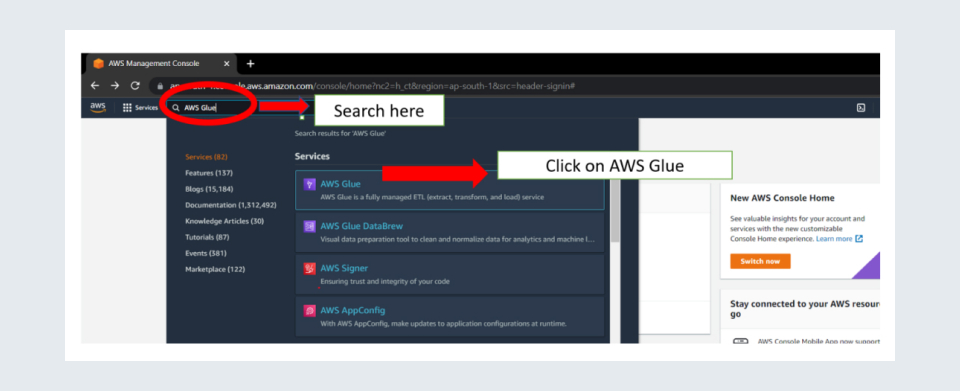
Step 1: Go to Glue Console. You can reach the glue console by using the search option at the top of the window you get after logging in to your AWS account. Search AWS GLUE and click on the first link.
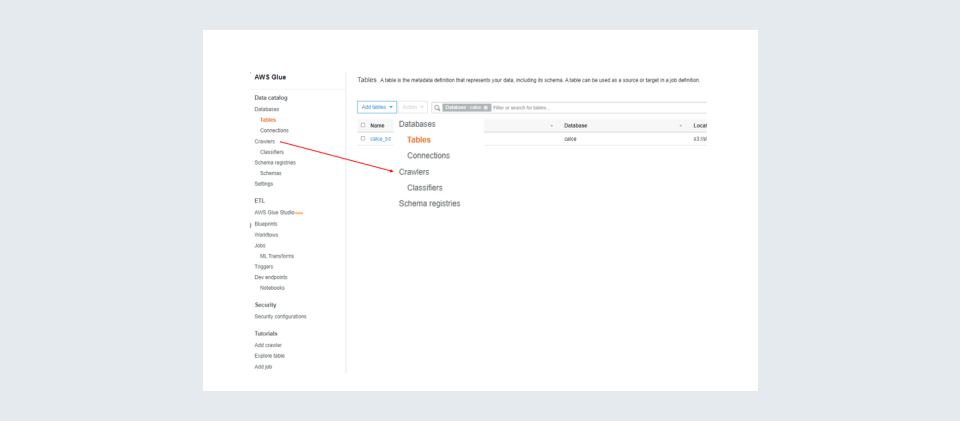
Step 2: In the console click on the ‘Crawlers’ in the left pane. They will take you to the Crawler.
Step 3: Click on the ‘Add Crawler’ button to create a new Crawler.

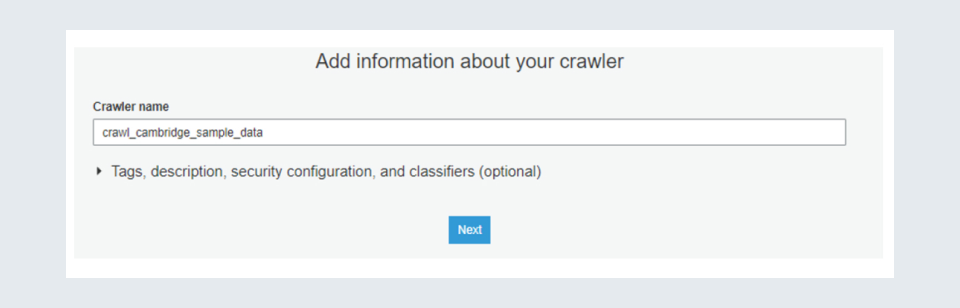
Step 4: Then you should see a field asking for a Crawler Name. Assign a suitable name so that you remember for what purpose the crawler is created as you make need to create multiple of them. After giving a suitable name click on the ‘Next’ button.
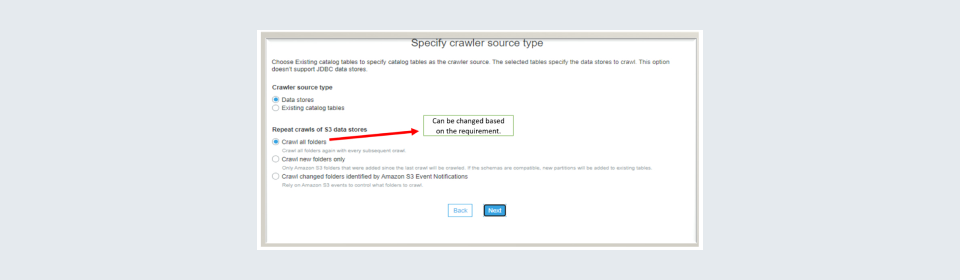
Step 5: This step is important as you are being asked about source type and what should be done if the crawler run is repeated. The most likely source type should be Data Stores unless you have an Existing Catalogue Table. For repeat crawls I have chosen the Crawl all folder as I am running it for the first time you may choose a different option based on how you would like to use it.
Step 6: The next step is to configure the Data Store. The data store can be a database that can be connected using the ‘Connection’ or a file or a folder in the s3 bucket. In my case, it is a file in an s3 bucket. Choose the appropriate one. After configuring the store click on the Next button


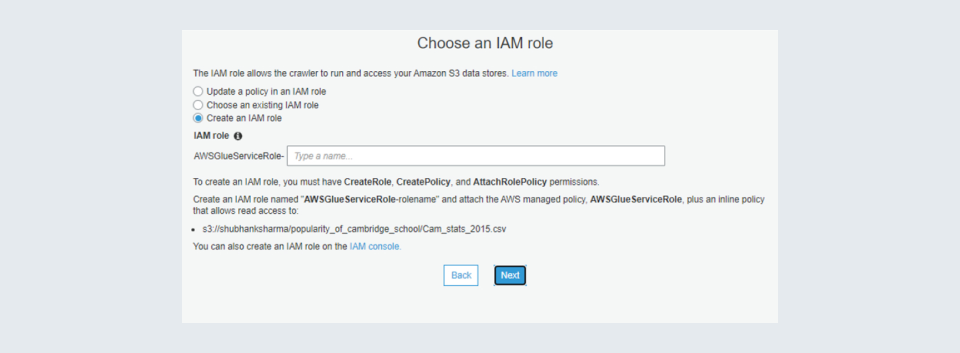
Step 7: Next you would be asked to select an IAM role. If you are familiar with the IAM role concept then you can select an IAM role and proceed further but for those who are unfamiliar, I have added images you can go through them. Also, it is important to note that the IAM role created should have an administrative access policy attached to it to access and store in the glue data catalogue. Also, IAM should have a cloud watch log policy attached also if you are reading from an s3 bucket it should have an s3 read-only access policy attached.
IAM role image 1: You can choose an existing IAM role or create one. To create one, you can go to the IAM console by using the search or using the link at the bottom.
IAM role image 2: In the console look for Glue

IAM role image 3: Once you have selected glue click on the ‘Next Permission’ button.
IAM role image 4: Search for the policies mentioned above and attach them. By attach I mean check the check box beside them.

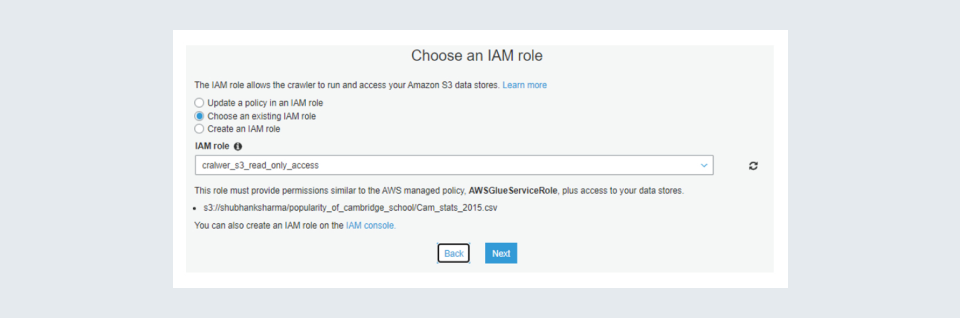
Then click one next tag. Give the IAM role a name. Make sure you note down this name and then select it in the crawler.
Step 8: Once done with selecting the IAM role click on the Next button.
Step 9: The next step is to create or choose a database. Usually, we create a new one by giving it some logical name. If you already have one and know how to connect to it, you can select it. I am creating a new one with the name ‘Cambridge_data_catalogue’, you can create it with the name of your choice and then click on the ‘Create’ button. This database will store the metadata for your tables in the data store.

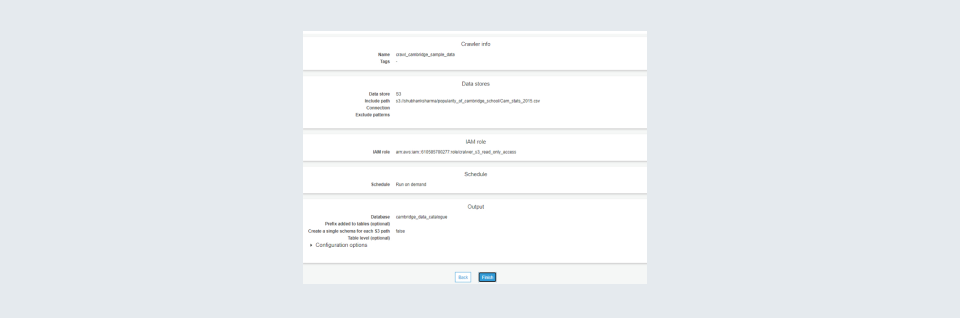
Step 10: Preview your crawler and click on the finish button.
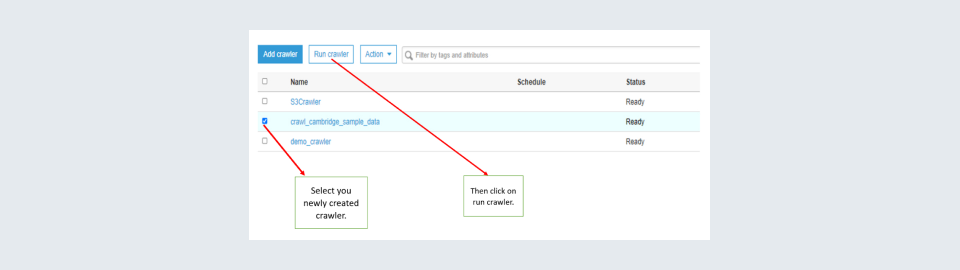
Step 11: Finally, it is time to test out the crawler. Select your newly created crawler and press run crawler at the top.
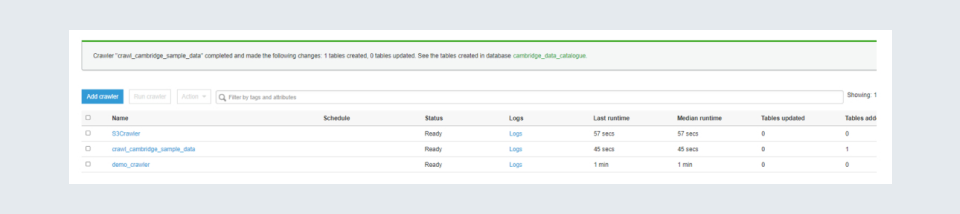
Step 12: You should get info on the top like how many tables got added to the catalogue.
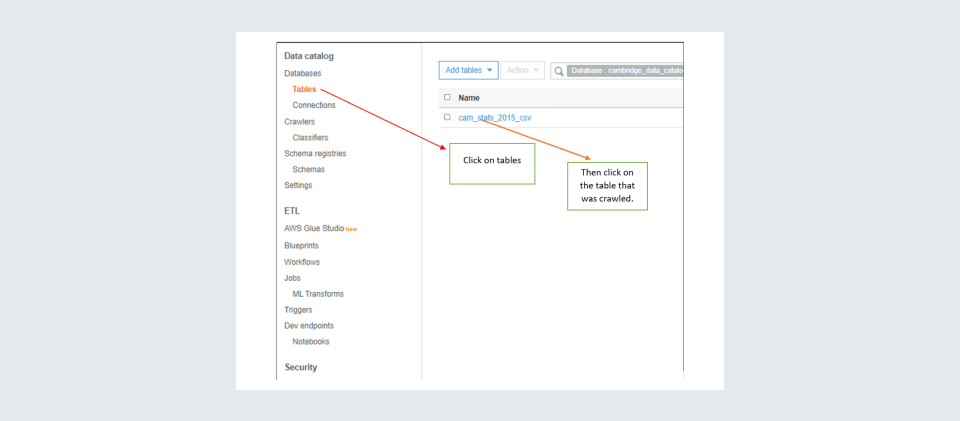
Step 13: You can see the table and the metadata in the tables pane on the left.
Step 14: Finally, you should find the metadata for your table. Verify that the metadata obtained is right. This concludes the crawler operation.

To learn more about defining a crawler and its use, you can visit the official documentation: https://docs.aws.amazon.com/glue/latest/dg/add-crawler.html.
Finally check the connection status at the top. You should get connected successfully.