
Running a Glue Job first requires defining the job to specify the source location, the transformations that be done to be done on the source, a target location, etc. It is very similar to any other ETL tool if you have used any. Most of the work can be done on the graphical interface provided in the tool but for certain customized operations, one may need to unlock the script. The script is written using the pyspark language, so you must be familiar with the basics of it to change the script. In this section, I will be giving a walkthrough about creating a glue job and running it. The previous sections i.e., the ‘Connection’ and the ‘Crawler’ are prerequisites for it. If you know about them, you can follow this section.
Steps to create and run a glue job:
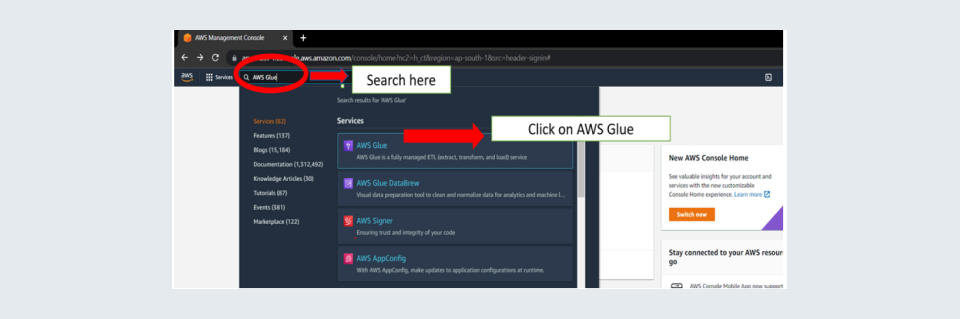
Step 1: Go to Glue Console. You can reach the glue console by using the search option at the top of the window you get after logging in to your AWS account. Search AWS GLUE and click on the first search.
Step 2: Once in the glue console click on AWS Glue Studio.

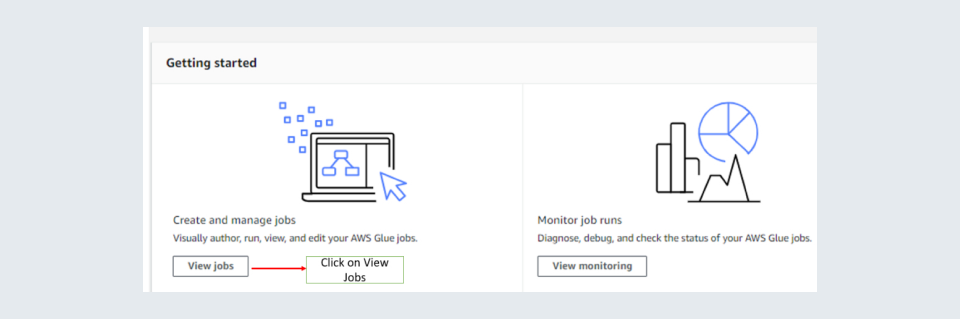
Step 3: When inside AWS GLUE Studio you should click on ‘View jobs’.
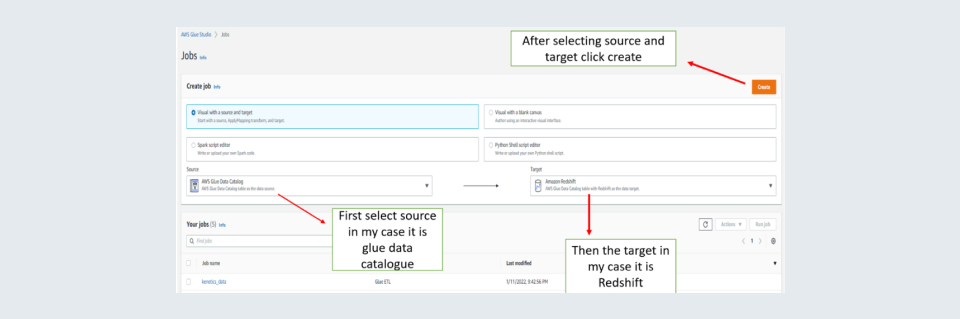
Step 4: Select your source data and the target and then click on create a button on the right.
Step 5: Change the job name on the top left to something logical which can be used to recognize the purpose of creating it and then click on the source datastore box in the first box to give details about the source.

Step 6: Select the source database and source table using the drop-down list in the tab Data Source Properties. In some cases, you may need to change the node properties for instance if you do not have a data catalogue. The data catalogue is the metadata output of the crawler mentioned in the crawler section. You can view the output by clicking on the output schema tab.

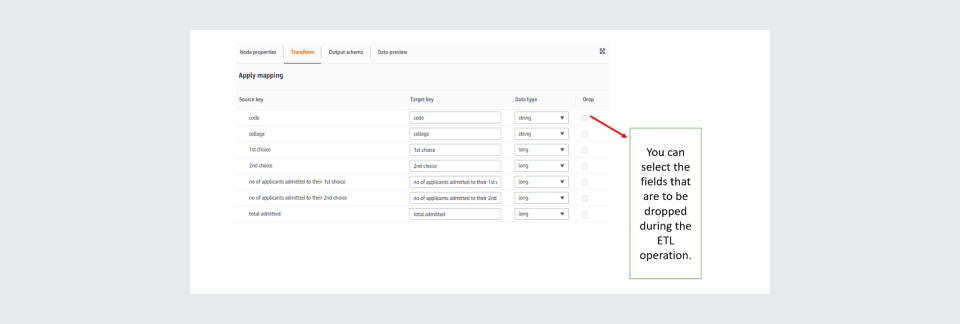
Step 7: Then click Apply mapping box and apply the transformations required.

Step 8: Apply the mappings required such as the columns to be selected and specify data types if any type castings are required.
Step 9: Once done then click on the target box in my case it is the Redshift cluster. You can select the database and target table. The visual tool should more than suffice for it. For me, as I have not created a target table in my target database i.e., the Redshift Cluster I will have to unlock the script to create a new table in my target database. You can skip a few of the following steps of unlocking the script and modifying it if it is not needed for the implementation.
To unlock the script, click on ‘Script’ on the top left.
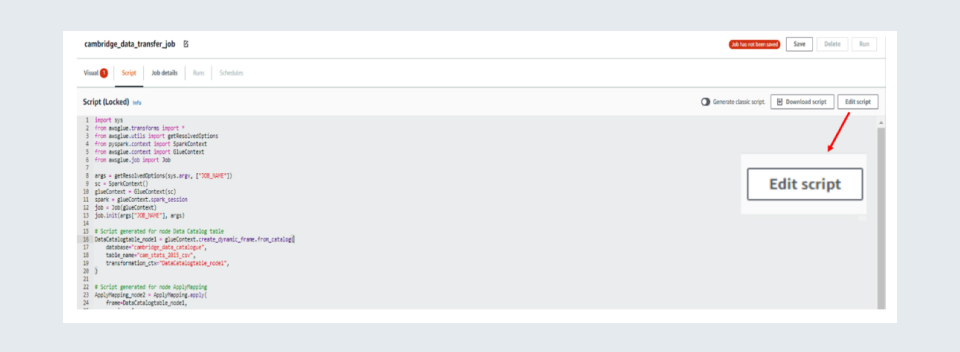
Then click on ‘Edit Script’ on the top right.
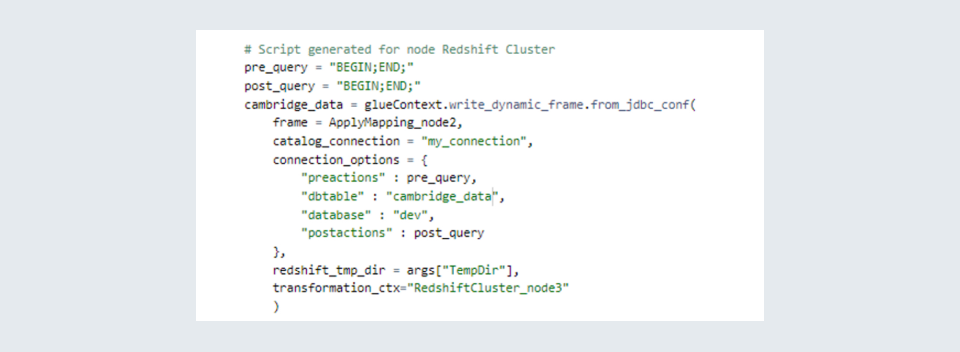
Now you can edit the script, but the edits made can not be visualized. What I have done here is at the last part of the script which contains the target part I have written my custom code to write the data to a newly created table. The script for it is shown below. This is fairly different from other ETL tools such as Microsoft Azure Data Factory where you don’t need to edit and script to create a new table and everything can be done using the visual tool but it must be remembered that AWS Glue is also meant for performing big data operations and not merely for moving data from one database to another.

Since this is a demonstration script, I have left the ‘pre_query’ and ‘post_query’ as blank. It happens many times that one may need to perform some operations before inserting data such as truncating a table, deleting some outdated records etc. That can be taken care of using these queries. In this script, I am moving the data after mapping to the table ‘cambridge_data’ in the database corresponding to the connection called ‘my_connection’.
Step 10: After all this is done go to the ‘Job details tab on top. In ‘Job details’ you need to give all the specifics to the job such as the number of worker nodes to be allotted, library files if required any for the job, connections used in the job etc. Usually, two worker nodes are sufficient to perform a job. Also, the worker type of G.1X is sufficient for most jobs. It is always good to keep several retires as zero so will not be incurring unnecessary charges for failed runs. Also, you can change the timeout time as per your requirements but do keep in mind that long time-out times are risky as you may incur unnecessary charges due to unintended long runs.
Step 11: Click on save on the top right

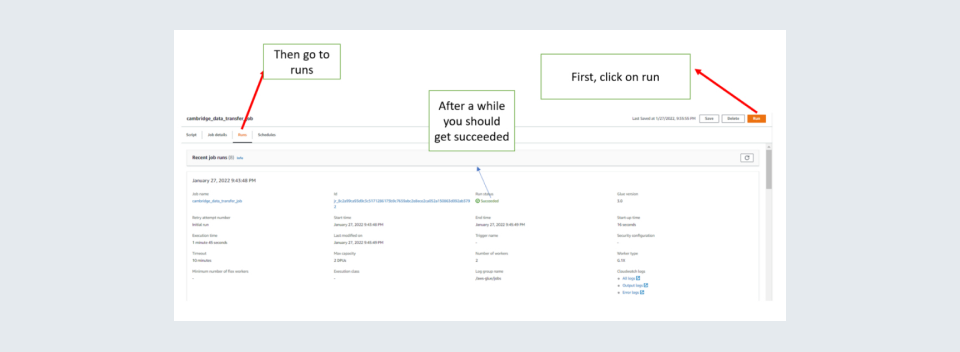
Step 12: Now you can click on Run the job to test it. Caution for free-tier users running of a job is not free and will be charged. Then go runs. In the runs after some time, it should show success for the job.

So, we have successfully set up and run a Glue Job. I would like to add a few things here:
- That you add more custom transformations by editing the script. You can visit the official documentation for doing it https://docs.aws.amazon.com/glue/latest/ug/transforms-custom.html
- https://docs.aws.amazon.com/glue/latest/dg/create-an-iam-role.html for more insights.
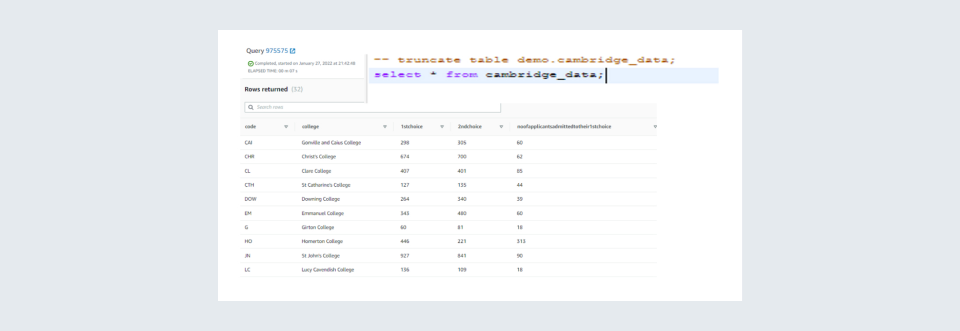
You can check if the data was moved correctly. In my case a ran a SQL query to check if data was transferred to my target database.
That is it from my side on running a Glue Job for more you can refer to: https://docs.aws.amazon.com/glue/latest/dg/aws-glue-api-jobs.html