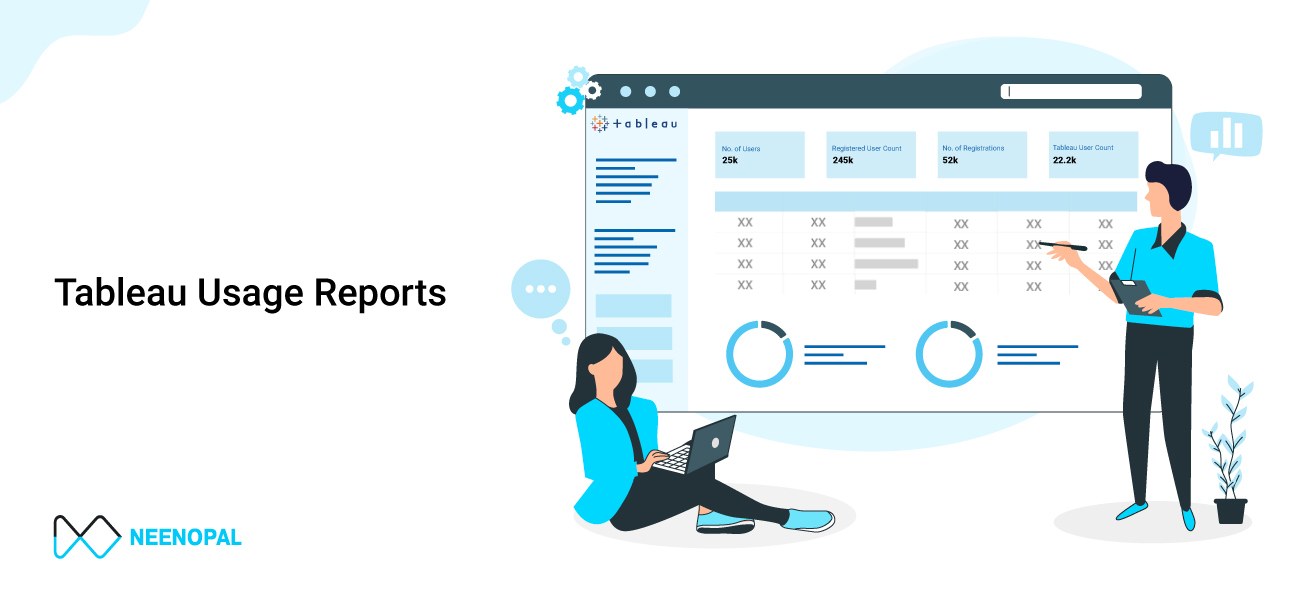
Administrative views are powerful monitoring tools that can help you optimize the Tableau Server and better understand how your users are interacting with Tableau content.
The following is the list of built-in views available on the Server
- Traffic to Views - Usage and Users for published views (Audit Table)
- Traffic to Data Sources - Usage and Users for Published Data Sources (Audit Table)
- Actions by All Users - Actions for all users (Audit Table)
- Actions by Specific User - Actions for a specific user, including the item used (Audit Table)
- Actions by Recent Users - Recent actions by users, including last action time and idle time (Audit Table) (Sessions)
- Background Tasks for Extracts - Completed and pending background task details for non-extract refresh (Background Tasks)
- Background Tasks for Non-Extracts - Completed and pending background task details for non-extract refresh (Background Tasks)
- Flow Performance History - View flow run performance.
- Stats for Load Times - View load times and performance history (Monitor Requests and Users)
- Stats for Space Usage - Space used by published content, including extracts and live connections (Resources and Extracts) (View Stats)
- Login-based License Usage - Usage summary or login-based licenses.
- Backgrounder Dashboard - Backgrounder job runtimes and busy periods (Background Tasks)
- Background Task Delays - Difference between scheduled and actual smart times of background tasks (Background Tasks)
- Performance of Views - Overall distribution of view load times and slowest views in a given time period (Monitor Requests and Users)
- Server Disk Space - Current and historical disk space usage, by server node (Disk Usage)
- Stale Content - Age and usage details for content that hasn’t been recently used.
- Data Quality Warning History - Data quality warnings in use, edited, or removed (Dash)
Traffic to Views
The Traffic to Views view gives you the ability to see how much of your user traffic goes to views.
You can filter what information is displayed and the time frame it comes from by selecting the view, the workbook, and the time range. Server administrators can specify the site.

Two timelines at the top of the view show you how views are being used over the time range you specify (the default is the last 7 days):
- What is the Total View Count by Day —This shows the total view count by day, based on the filters you set. Hover your mouse pointer over a point on the line to see the count of views. Select the point to update the other sections of the view based on your selection.
- What is the Total View Count by Time —This shows the view count by the time of day. The filters and any selection impact this graph.
Two bar graphs at the bottom of the view show results that are filtered by the Min View Count filter at the top of the view. These show you the views that are most often accessed and the users who most frequently access those views. Only those views and users with counts greater than or equal to the minimum view count value are displayed:
- What Views Are Seen the Most —This is a list of the most visited views. Like the other sections of the view, the information is limited by filters and any selection you make.
- Who Accesses Views Most Often —This shows the users who most often access the views and is limited by filters and any selection you make.
Traffic to Data Sources
The Traffic to Data Sources view gives you the ability to see the usage of data sources on your Tableau Server installation. This can help you determine which data sources are most heavily used and those that are less often used. You can filter the information you see by selecting the data source, the action that was taken on that data source, and the time range. Server administrators can specify the site.

A timeline at the top of the view shows you how data sources are being used over the time range you specify (the default is the last 7 days):
- What is the Total Data Source Usage by Day —This shows total data source usage by day, based on the filters you set. Hover your mouse pointer over a point on the line to see the count. Select the point to update the other sections of the view based on your selection.
Two bar graphs at the bottom of the view show results that are filtered by the Min Interactions filter at the top of the view. These show you which data sources are most used, and who uses data sources most often. Only those data sources and users with interaction counts greater than or equal to the minimum interaction value are displayed:
- What Data Sources are Used Most —This is a list of the most used data sources. Like the other sections of the view, the information is limited by filters and any selection you make.
- Who Uses Data Sources Most Often —This shows the users who most often use the data sources. This is impacted by filters and any selection you make.
Actions by All Users
The Actions by All Users view gives you insight into how your Tableau Server installation is being used. You can filter the view by actions and by time range. Server administrators can filter by the site. The Total Users count shows the number of users who have performed an action. This value is not affected by any filtering. The Active user count shows the number of active users who have performed one of the selected actions.

Up to three separate groups of timelines show you how users are using Tableau Server over the time range you specify (the default is the last 7 days). If no actions are selected for a particular group, that group does not display. Possible groups are
- Access & Interactions— This shows your sign-in (log-on) activity, view access, and data source use.
- Publish & Download— This shows the publishing and downloading of flows, workbooks, and data sources.
- Subscriptions— This shows counts of subscription emails sent for workbooks and views. It also shows the counts of flow runs.
Use the legend at the bottom to view a subset of the displayed actions. Click a single action to highlight the line for the action, or Ctrl + Click on multiple actions to highlight more than one. To clear the selection and display all the selected actions, click on any action in the legend.
Actions by Specific User
The Actions by Specific User view gives you insight into how individual users are working in your Tableau Server installation. You can filter the view by user name, actions, and time range. Server administrators on multi-site installations can filter by the site.

Up to three separate groups of timelines show you how a selected user is using Tableau Server over the time range you specify (the default is the last 7 days). If no actions are selected for a particular group, or if no actions were taken, that group does not display. Possible groups are
- Access & Interactions —This shows your sign-in (log-on) activity, view access, and data source use. This means any interaction with a Data Source by the selected user, including extract refreshes scheduled by that user, or the user accessing a workbook that is associated with that data source.
- Publish & Download —This shows the publishing and downloading of flows, workbooks, and data sources.
- Subscriptions —This shows counts of subscription emails sent for workbooks and views. It also shows the counts of flow runs.
A bar graph at the bottom of the view shows which items the selected user is using.
Use the legend at the bottom to view a subset of the displayed actions. Click a single action to highlight the line for the action, or Ctrl + Click on multiple actions to highlight more than one. To clear the selection and display all the selected actions, click on any action in the legend.
Actions by Recent Users
The Actions by Recent Users view shows you which signed-in users have been active on the Tableau Server over the past 24 hours. This can be useful if you need to perform some maintenance activity and want to know how many and which users this will affect, and what they are doing on Tableau Server.
The view Active, Recently Active, and Idle users that are currently signed in to Tableau Server. For this view, an active user is one who took an action in the last 5 minutes, a recently active user is one who last took an action within 30 minutes, and an idle user is one who last took an action more than 30 minutes ago. The actions are displayed in the lower section of the view.

Select a user to see only the actions that the user performed recently. Hover over an action to see the details of the action.

Background Tasks for Extracts
The Background Tasks for Extracts view displays extract-specific tasks that run on the server.

To better understand this pre-built administrative view, make note of the following:
- The table, "What Extracts Ran on this Server," lists the extracts that ran in the time period specified in Timeline.
- You can click Success or Error to filter the table based on status.
- You can also click a specific task to update the "How Much Time Did Extracts Take" graph for the selected task.
The table, "How Many Extracts Succeeded or Failed," updates for the status (success or failure) of the task, but the count of extracts that succeeded or failed does not change.
Status
Tasks can have a status of success or error.

See details about a task
For details on about the task, use your mouse to hover over the success or error icon.

Background Tasks for Non-Extracts
Background Tasks for Non-Extracts view displays tasks that the server runs that are not related to extract refreshes. For example, edited OAuth connections, subscription notifications, and so on.

A table lists the tasks that ran in the time range specified. Click Success or Error to filter the table based on status. Select a specific task in the How Many Tasks Succeeded or Failed on this Site table to update the What Background Tasks Ran on this Site graph for the selected task.
Tasks can have a status of success or error. For details about the task, use your mouse to hover over the success or error icon.

Details that you can see about the task are its ID, status, priority, and when it was created, started, and completed. You can also see its runtime: the total run time of the background job, which includes the run time of the job plus background job overhead such as initialization and cleanup. You can also see which backgrounder the job is running on
Flow Performance History
Use this view to see the performance history for all the flows on a site. You can filter by Flow Name, the Output Step Name, Flow Owner, Run Type (Scheduled or Ad Hoc), and the time the flow runs were started.

Here are some questions you can answer using this view:
- What flow tasks are currently scheduled? —To do this, use the Start Time filter and select the time frame you want to look at. For example, to see flow tasks that are scheduled in the next 3 hours, select Hours -> Next -> and enter 3.
- What is the duration of the flow tasks? —To answer this, click on a mark in the view and you should see details including the task duration.
How many flows were run ad hoc, and how many were scheduled runs? - To answer this, use the Run Type filter and select Ad hoc or Schedule
In addition to the questions described above, here are some examples of insights you might be able to gather:
- The flows that are running most frequently will have the most marks.
- To see how many flows are running at the same time currently, hover over a mark that shows “In Progress” or “Pending and select “Keep Only” to filter all flow runs that are currently running.
- To see how many flows are running at the same time during a specific time range, select a range for the Start Time filter. For example, you can choose “Next three hours” to see which flows will be running in the next three hours.
Stats for Load Times
The Stats for Load Times view shows you which views are the most expensive in terms of server performance. You can filter by view and time range. Server administrators can filter by site. You can also limit the view based on load time in seconds, using the sliding Load Time filter. Load times are for the server. Depending on your client browser and networking, actual load time may vary slightly.
The Average Load Times graph shows average load times for views based on the filters you set. Hover over a point to see details. Select a point on the line to update the rest of the view for the selection:

The Exact Load Times view shows the exact time to load the listed views. A vertical line shows the average load time for each view. Select a mark to see details of a specific instance of the view loading:

Stats for Space Usage
The Stats for Space Usage view can help you identify which Tableau content uses the most disk space on the server. Disk space usage displayed by user, by project, and by the size of the Tableau content (workbook, data source, flow output, or virtual connection) and is rounded down to the nearest number.
To open this view, click Site Status on the left nav, and then under Dashboard, click Stats for Space Usage.

Use the Min Size filter to control which Tableau content displays, based on the amount of space they use.
Three bar graphs give you information about space usage on your Tableau Server:
- Which Users Use the Most Space —This shows the users who own data sources and workbooks that use the most space. Click a user name to filter the next two graphs for that user. Click the data source bar or the workbook bar for a user to filter the next two graphs for that type of object for that user. Click the selected user or bar to clear the selection.
- Which Projects Use the Most Space —This shows the projects with the data sources and workbooks that use the most space. If a user or object type is selected in the Which Users Use the Most Space graph, this displays information specific to the selection.
- Which Workbooks, Data Sources, Flows, and Virtual Connections Use the Most Space —This shows which Tableau content uses the most space. The bars are color-coded based on the length of time since the last refresh.
Move your cursor over any bar to display usage details:

Click on a bar to select it and update the other areas of the view based on that selection.
Login-based Licence Usage
Note: This view is only available to site administrators and server administrators when login-based license management is enabled on the Tableau Server.
The Login-based License Usage view lets server administrators view login-based license activation usage for Tableau Cloud or Tableau Server. The Login-based License Usage view can help you manage licenses efficiently and determine if you need more or fewer licenses. This view can help you answer the following questions:
- Who is using a Tableau Desktop or Tableau Prep Builder license in my enterprise?
- Has a Creator role been shared or transferred?
- Has any activation activity occurred on a computer where it should not be?
- On which host is the activation being used?
- Which role is assigned to the user?
- On which Tableau product is the license in use?
- On which Tableau version is the license in use?
- Did the Creator role activate through Tableau Desktop or Tableau Prep Builder?
- Has the Creator seat been activated?
- How many Creator seats are in use?
- How many Creator seats are not in use?
- When was a Creator seat last used?

Filters
On the report screen, you can change the time window to show when seats were last used, filter on actions, filter on user name, and sort by columns.
- Time Window in Days —Enter the number of days for which to view login-based license management-activated client usage data. You can view data for the past 30 days up to a maximum of 183 days.
- (All) —Apply all filters to the view.
- Activated —Show Creator users that have activated using login-based license management.
- In use —Show Creator users who activated using login-based license management whose seats are in use.
- Last used —Show when the login-based license management client was last used.
- Unassigned —Show which login-based license management activated Creator seats are currently unassigned.
- User name —Show login-based license management activations in use by the specified user.
When you hover over the filter card, a drop-down icon appears. Click the icon to specify whether the view should include data that matches the filter (the default) or exclude data that matches the filter:

Which creator seats have been in use in the last < nn > days?
This area of the dashboard shows a list of three types of licenses (activated, in use, and unassigned). Hovering over an activated, in-use, or unassigned mark gives you information including the registered user of the copy of Tableau. Click a column head to sort the list.
Which creator seats have not been used in the last <nn > days
This area of the dashboard shows a list of licenses that have not been used during the specified time period. A timeline shows the last use date. Hovering over a last use mark gives you information including the registered user of the copy of Tableau.
Backgrounder Dashboard
The Backgrounder Dashboard view is an overview of the background jobs. Using this view, you can find more information about
- The time it takes for jobs to run.
- When the backgrounder is busy or overloaded.
- Jobs that were completed successfully, failed, or canceled.
Summary and Filters

A - At the top, is a summary chart that tells you the number of jobs that have succeeded, failed or canceled. You can click on the sections of the bar chart to filter the information by job status. This filter is applied to the entire view and the information displayed includes only jobs with the job status that you selected.
B - You can find additional filter options by clicking on the filter icon. A Filter pane is displayed that allows you to filter by Task type, Job executed at, Site, Project, Content owner, Schedule, and Backgrounder ID. The Backgrounder ID is unique to a Backgrounder process. You can use this to see the information about the work done by each Backgrounder process. When you select one or more of these filters, they are applied to the entire view.

Details
The Backgrounder Dashboard has four sections each showing different information about jobs. Each of these sections have more filters in the drop down menu that you can apply to that specific section.
1. The section at the top left gives you information about the jobs with the selected job status or any filters you selected using the Filter pane. If no selection is made, all jobs are included.
The information displayed also varies based on the selection you make using the drop-down:
- Total run time: This shows you the total run time for all jobs with the selected job status and any other filters you selected. For example, if you selected, Job Status: Failed, and Task type : Subscriptions, the graph shows all subscription jobs that failed.
- Number of Jobs: This shows you the number of jobs that ran for the selected job status and any other selected filters.
- Maximum delay: This shows you how long the jobs were queued before running.

2. The section at the top right gives you information on how busy or overloaded the Backgrounder is on a given day and time. The information displayed however depends on the filter selections you made for the job status and other options in the Filter pane.

If you click on the information icon at the top right part of this section, a color legend is displayed.
- The variations in the blue color correlate to the number of jobs running in that time period. The darker the blue, the more jobs that are running.
- The variations in the orange color correlate to the queue times. The darker the orange, the longer the queue time.
- Using both of these metrics, you can identify when the backgrounder is busy (dark blue) or overloaded (dark orange).

3. The section at the bottom left gives you run time information about the jobs with the selected status or any other filters you selected using the Filter pane. If no selection is made, all jobs are included. Select marks in the top sections to populate this section with details for the selected content.

The drop-down selections give you more options and the information displayed changes accordingly:
- When Title is selected, the run time information for each individual job is displayed.
- When the Project is selected, the total run time for each project is displayed.
- When Job Creator is selected, the total run time for jobs created by a specific user is displayed.
- When the Site is selected, the total run time for jobs on that specific site is displayed.
- When the Schedule is selected, the total run time for jobs using that specific schedule is displayed.
4. The section at the bottom right tells you how long it took for each job to run.

Background Task Delays
Note: This view is only available to server administrators
The Background Task Delay view displays the delay for flow tasks, extract refresh tasks, and subscription tasks—that is, the amount of time between when they are scheduled to run and when they actually run. You can use the view to help you identify places where you can improve server performance by distributing your task schedules and optimizing tasks.

Here are possible reasons for the delays, and ways that you might reduce the delays:
- Many tasks are scheduled for the same time. In the example view, tasks that show long delays are clustered at the same time every day, which creates spikes in the wait time. Note that you can set the Timeline filter to a single day to view task delays by hour and identify the hours of the day that have many tasks scheduled at the same time. A solution to this issue can be to distribute the tasks to off-peak hours to reduce load on the server.
- Specific tasks take a long time to run and prevent other tasks from running. For example, there might be an extract refresh job that is connecting to a slow data source or that is processing a large amount of data. Use the Background Tasks for Extracts administrative view to identify which extract refresh tasks are running slowly. You can then optimize the extract refresh task by filtering the data, aggregating the data, or creating multiple data sources for individual tables in a data source.
- Other server processes are running at the same time and are consuming server resources and slowing down performance. Monitor the CPU and memory usage of server processes to see which processes are consuming the most resources and then adjust the configuration of processes on your server.
Performance of Views
Note: This view is only available to server administrators
The Performance of Views administrative view displays how long it takes for views to load and how many sessions are running at a time on the server.

You can compare spikes in the number of sessions with spikes in slow load times to identify the times of day when high user traffic is slowing down the server. You can also look at the individual views by load time to understand which views take the longest to load.
Some views might take a long time to load regardless of when they are viewed. You can identify which workbooks need to be optimized with the Stats for Load Times administrative view. Some simple ways to optimize workbooks include the following:
- Display less information in each view.
- Break up views.
- Reduce the number of filters.
- Use data extracts.
Server Disk Space
Note: This view is only available to server administrators
Use the Server Disk Space view to see how much disk space is in use on the computer or computers that run Tableau Server, where disk space refers only to the partition where Tableau Server is installed. You can also use this view to identify sudden changes in disk space usage.
This view reports disk space usage as a decimal GB value. If the operating system of your Tableau Server computers reports the value using binary GB, the amounts can differ.
For a distributed installation, the view displays information about each computer in the cluster.

The Server Disk Space view includes two graphs:
- What is the most recent disk space usage?—This graph shows disk space usage for the last 30 days both in gigabytes and as a percentage. Disk space refers only to the partition where the Tableau Server is installed.
- How has free disk space trended in the last month?—This graph shows changes to disk space usage over the last month. Rest your pointer on a line to view the exact amount of free disk space for a point in time.
Note: You can have Tableau Server notify you when free disk space falls below a threshold that you specify.
Stale Content
The Stale Content view can be used to identify content that hasn’t been used or accessed in the specified time period (displayed as Stale Access Threshold). You can set that time period in days. The minimum value for the time period is 1 day and the maximum is 120 days.
This view also provides information about the disk space used by stale and active content.

Summary and Filters

- At the top of the view, you will see a statement that summarizes the amount of space that is used by stale content compared to the total space used. The total space used is defined as the sum total of disk space used by active and stale content.
- This summary is followed by a chart that gives you a further breakdown of the types of stale content and content that is considered active - meaning content that has been accessed in the time period below the stale threshold. You can click on the bar chart and apply it to filter the data displayed in the view.
- You can see and apply additional filter options by clicking the filter icon. This filter pane includes
-
- Stale Threshold
- Site
- Content Owner
- Size
- Content type

These filters are applied to the entire view.
Details
The Stale Content view has three sections as described below that provide details:
- The top left section shows you the total space used for the selected content. The x-axis shows the number of days that have passed since the content was last opened, and the y-axis shows you the size. The graph also shows the stale threshold. Set your desired staleness threshold, then use this view to identify the content that is the stalest. Click the Stale Workbooks or Stale Datasources in the bar at the top to filter to the content of interest. Select the marks to the right of the Stale Access Threshold to see more details about the content. The details are displayed in the bottom left section.

- The top right section shows you the amount of space that is used by each selected content. For example, if you select Stale workbooks, the space used by each stale workbook is displayed. You can use this section to find out which content is the stalest or is taking the most space. This section helps you identify content that hasn’t been used in a long time. Click the Stale Workbooks or Stale Data Sources on the bar at the top. Select the oldest set of unused content (marks further to the right) to see more details. The details are displayed in the bottom left section. This can be your next set of content to consider for archiving or deleting as these are contents that nobody has been using, regardless of size.

- The section at the bottom shows detailed information about the selected content as shown below:

Archive or Delete Stale Content
Starting in 2020,3, the Stale Content admin view includes a feature that allows you to select and tag content as stale. You can select content from either the section at the bottom or the top right section. When you make a selection, you will see the number of objects and the type of content that is selected, as seen in the screenshot below. Click the Tag Objects button to tag the selected content.
In the screenshot shown below, content that has not been opened in the last 160 days or more is selected to be tagged as stale content.

To find all the tagged content, on the Tableau Server web interface, navigate to Explore. Select the Stale Content filter to see all the content that has the stale content tag. You can now select the content and either move it to a project that you use for archiving or delete the content.

If you have Advanced Management on your Tableau Server, you can use the Tableau Content Migration Tool to manage to archive stale content on a regular schedule. For example, you can build a plan that runs on a regular schedule that can automatically pick up content tagged as Stale Content and move it to an Archive project. After a certain amount of time, the content in this project can be purged from the system.
Data Quality Warning History
When Tableau Catalog is enabled in your environment, site administrators can see how data quality warnings are being used on the site using the pre-built admin view, Data Quality Warning History.
From the Site Status page, select the Data Quality Warning History dashboard:

The dashboard shows how many data quality warnings are active over a period of time. It also shows how many warnings have been changed (created, updated, and deleted) over that same time period.
See warning details
Under the line charts are the details about the data quality warnings, including
- Date and Time — When the warning was created or last changed.
- Content-Type — The type of asset the warning is set on, such as a database, table, or data source.
- Content Name — Name of the asset the warning is set on.
- Changed By — Name of the person who created or last changed the warning.
- Status — If the warning is active or inactive.
- Type — Warning type can be Stale data, Warning, Deprecated, Sensitive data, or Under maintenance.
- Visibility — The warning can be configured to have normal (the default) or high visibility.
- Message — The message the warning creator wrote to display to users when they see the details of the warning.
Filter warning history
When you review the data quality warning history, you can click a mark on the view to filter the details shown below the view.

The numbers on the Day axis represent the date within the time range. For example, if today is November 18, and you filter for the last 7 days, the Day axis shows 12-18.
More filters are available when you click the filter icon in the upper right corner: filter by time range and by content type.
Filter by time range
You can configure the time range from years to minutes.

Filter by content type
You can see all the data quality warnings on your site, or you can filter to see warnings for specific types of assets, like data source or table:

Create Custom Views
All the above views can be downloaded from the Server in the form of PDFs, Images, Crosstab, and other such formats. In the earlier versions, Tableau also allows you to download them in the form of a workbook. This made it easy for us to customize them according to our requirements. But this feature is not available in the recent versions.
So, in addition to the pre-built views available on the Maintenance page on the Server, you can use Tableau Desktop to query and build your own analyses of server activity. To do this, you can connect to and query views in the Tableau Server repository using one of two built-in users: the "tableau" or "read-only" user.
- The Tableau user — The Tableau user has access to special views and a subset of tables in the repository database. These views and tables are provided so that administrators can create custom administrative views. Tableau makes an effort to limit changes to these tables and views so that custom views built with them do not break.
- The read-only user — The read-only user has access to a large number of the repository tables, providing more data about server usage. Administrators can use these to create custom administrative views too, but many of the tables are intended primarily to support the functioning of Tableau Server and may be changed or removed without warning. This means that views created from these tables can break when the database structure is changed.
Connect to Tableau Server Repository
The Tableau Server repository is a PostgreSQL database that stores data about all user interactions, extracts refreshes, and more. You can enable access to the repository and use the data in it to help analyze and understand Tableau Server Performance.
After you enable access to the Tableau Server repository, you can create views with data from the repository. The views that you create with this data are sometimes called custom administrative views. In addition to being used for performance monitoring, custom admin views can be used for tracking user activity, workbook activity, and more. Alternatively, if you are only interested in performance data, you can use the preselected database tables in the sample performance workbook.
Enabling access to the Tableau Server Repository
You can use Tableau Desktop to connect to and query the Tableau Server repository using two built-in users. The user named Tableau has access to several database views you can use as part of building your own analyses of Tableau Server activity. The user named read-only has access to additional database tables that you can use to create views for even more in-depth analysis and this is the user we recommend you use.
Before you can connect to the repository, you need to enable access for the read-only user to the database. Use the time data-access repository-access enable command to enable repository access. When you enable repository access, you also create a password for the read-only user. You will use this password to access the repository. You may also need to have port 8060 opened on the repository node so you can connect to the database.
- Verify that port 8060 is opened on the computer where the repository is installed. This is a requirement if you are connecting remotely.
- Enable repository access and create a read-only user password: tsm data-access repository-access enable --repository-username read-only --repository-password <PASSWORD> If your password includes special characters, then you must enclose the password in double-quotes. This command will restart the Tableau Server.
Note: If you later decide that you want to disable remote access to the Tableau Server repository, use the tsm data-access repository-access disable command. The command disables external access to the repository. This will not disable access from localhost.
This section describes how to connect to a custom set of tables from the Tableau Server repository.
- In Tableau Desktop select Data > Connect to Data, and then select PostgreSQL as the database to connect to.
- In the PostgreSQL connection dialog box, enter the name or URL for the Tableau Server in the Server box. If you have a distributed server installation, enter the name or IP address of the node where the repository is hosted. Connect using the port you have set up for the pgsql.port, which is 8060 by default.
- Specify the workgroup as the database to connect to.
- Connect using the user and the password you specified.
- Click the Require SSL option if you have configured Tableau Server to use SSL for connecting to the repository. Click Connect.

- Select one or more tables to connect to. The tableau user has access to all of the tables that start with an underscore or with hist_. For example, you can connect to _background_tasks and _datasources. The readonly user has access to additional tables that can be used to query other information about server usage.

- Click Go to Worksheet
PostgreSQL Version
Use the following steps to find the version of PostgreSQL used by Tableau Server:
- Log into the Tableau Server directly or through a remote connection.
- Launch Task Manager.
- Click the Details tab.
- Right-click one of the postgres.exe processes and select Properties to see the version of PostgreSQL installed.
You can also connect to the workgroup database and issue the following query to get the version: select version()
Before you can connect using one of the built-in users, you must enable access to the Tableau Server database. After doing this you can use Tableau Desktop to connect to and query the database as the tableau user or the readonly user.
The tsm configuration set option auditing.enabled controls whether Tableau Server collects historical user activity and other information in the repository. It is enabled by default. Be aware that collecting historical events impacts the size of the Tableau Server's backup file (.tsbak).
- All hist_ tables are controlled by the tsm configuration set option wgserver.audit_history_expiration_days, which controls how many days of event history are kept in the repository and has a default value of 183 days.
- The _http_requests table is cleaned of all data older than 7 days when you run tsm maintenance cleanup with the --HTTP-requests-table option. The _background_tasks table is cleaned automatically and keeps data for the last 30 days.
- All other tables with names that begin with a "_" prefix contain current data.
After connecting to the Tableau Server Repository, you can build custom views with the above-mentioned tables.
Some examples of the custom views are available in the following link